# VOD Service
The IOIO VOD service allows uploading, converting and serving VOD's in HLS, MP4 and other common formats.
This guide contains:
- Authentication
- API key
- Uploading a file to the VOD Service.
- Get all VODs via the Broker API
- Get a single VOD by GUID
- Editing a VOD
- Auto generate captions to a VOD.
Authentication
Тhe IOIO API supports two types of authentication: API Key authentication - used mainly for Server to Server communication, does not expire and has no limitations. When using an API key as an authentication method the following must be taken into account: all requests must be prefixed with the route “/private” . For example /broker/private/ as opposed to /broker/. This is to distinguish requests which use API keys vs JWT Tokens JWT Token - mainly used by web or mobile Front End applications like the iOiO cloud UI. The token TTL is set at 60 mins and needs to be refreshed. It carries information about the User Role and User’s Permissions
For testing purposes the Staging environment can be used:
- ioAuth Swagger: https://ioauth-stg-swagger-bucket.s3-us-west-2.amazonaws.com/index.html
- Swagger: https://qa2-broker-dev-swagger-bucket.s3-eu-west-1.amazonaws.com/index.html
- API Key: fxP35E7AIJ8elvZM0pwes2gGLVuDE9ro1sKPqhoN
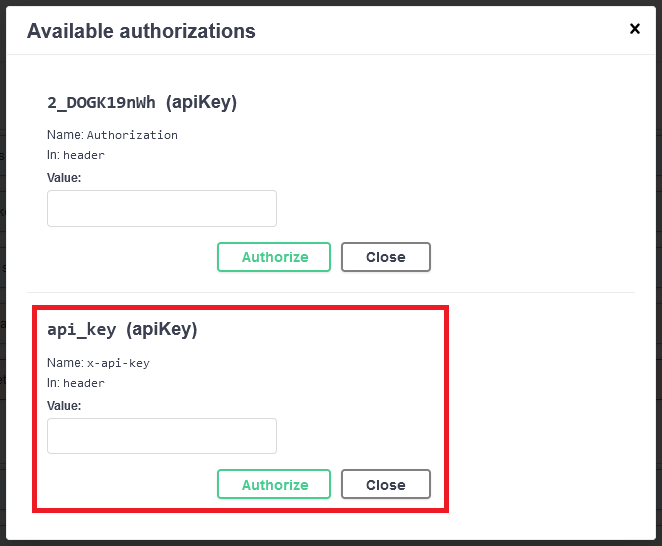
When authenticating with an API key it needs to be placed in the right authorization type. Name: s is the correct name with the value field below it. When making requests, please this as the header.
API key
You can issue an API by using your login credentials
To issue an API key, the following steps needs to be taken:
- A json token issued by the ioAuth service is required in order to have an API Key issued afterwards.
- Open the Broker API.
- From the API Keys group the Store new API key request needs to be executed:
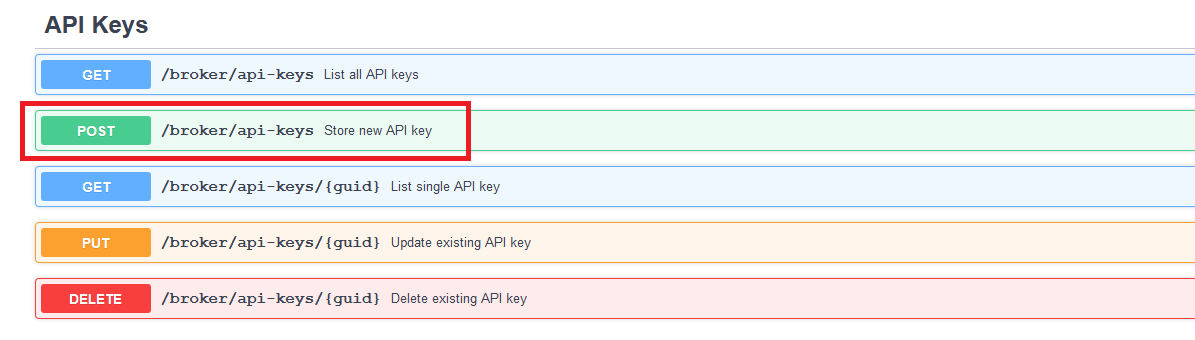
- There are two items that needs to be passed on in order to have the API key issued:
- name - a string which stores the name of the API Key in for display purposes.
- active - a boolean type which has true and false options. When active has a value of false the API key is not active and it cannot be used for communicating with the Broker Service.
- The response of the Store new API key will look similar to this:

The last item of the url is the guid of the API Key this is used in order to get the value of the API key with the next request.
6. To obtain the API key the List single API key request needs to be executed with the Api key guid value passed on, the response will be the following:

The field value contains the actual API key which is used for authentication when using the Broker API.
Uploading a file to the VOD Service.
A sample scenario for uploading a file will be reviewed below.
- Creation of metadata. Each video file has associated metadata with it so that when it is requested via the API we can see its name, description, genre and any other additional metadata which has been added to it. To create a metadata for a video this endpoint is used:
- POST /broker/private/vod/meta Store VOD meta data
The response from the request will return the guid of the metadata. This guid needs to be attached to the file which will be uploaded. This will allow the broker service to know what metadata needs to be assigned internally to the video. This is achieved by assigning the x-amz-meta-metaguid key with the value being the GUID of the metadata created above.

- Name of the video file before uploading The file needs to be renamed due to restrictions of AWS S3. The front end which handles video uploading does this in the following manner: ${md5(file.name + new Date().getTime())}.${extension}`;
Getting the multipart upload settings for the AWS SDK from the Broker API.
Uploading videos to the Broker service is done using the AWS SDK. This allows to utilize the multipart upload which is extremely useful and allows for uploading videos safely even when the internet connection is unstable.
- Open the Broker API and locate the Upload group requests.
- Execute the GET /broker/private/upload-multipart request. The response should look like this:

These settings are used when uploading videos via the AWS SDK.
Uploading directly to S3 via IAM authentication: Uploading to S3 is also possible by using credentials IAM credentials. This allows using Secret Key and Access Key to upload to the sources bucket which stores the video sources. Again when uploading a video to the S3 bucket the tag x-amz-meta-metaguid should contain the metadata GUID which has been created in the previous steps.
S3 Bucket Credentials (staging): Access Key ID: AKIAZ4OFCHY76E5URRMN Secret Access Key: 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 Region (If needed): eu-west-1 Bucket Name: qa2-vod-source-1schnjdiyq7fn
You can use the upload, managed upload and multipart upload APIs from the AWS SDKs to upload directly to the ingest bucket from a web browser or a server. Please make sure to secure the S3 credentials on the server side and an UIs.
Get all VODs via the Broker API
The videos in the Broker API can be obtained using the /broker/vod/list API request. This request is not protected and is executed without the need for authentication. The request accepts one query parameter which allows filtering VODs by status. Statuses which can be used for querying:
- archive
- complete
- Encode-later
- error
Get a single VOD by GUID To view the details of a VOD the /broker/vod/list/{guid}/info endpoint needs to be used. This endpoint accepts a guid as a query parameter and returns detailed information about the VOD. A VOD guid can be obtained from the /broker/vod/list. The info contains information about the VOD such as:
- mediaType
- Metadata listed as meta in the response.
- Image url which is a thumbnail extracted when the video has been encoded.
- Hls URL which holds the hls playback url. For a complete list of fields in the info refer to the Broker Swagger.
Editing a VOD
To edit a VOD the following endpoint must be used /broker/private/vod/list/{guid}. This endpoint allows editing of the metadata. A sample request can be found below:
{
    "originalFileName": "01.10_53TLUf8ReV8_360p.mp4",
    "title": "53TLUf8R",
    "type": "source",
    "imageUrl": "https://qa2.stg.ioio.tv/sources/7044ff3a-d9bf-468c-8ffe-42179b445764/thumbnails/39970fce915416e7f04db8fe631bca2f_abr_tumb.0000064.jpg",
    "custom_data": "",
    "description": "desc",
    "group": "26.10.2020",
    "genre": "26.10.2020"
}
# Auto generate captions to a VOD.
The Broker service allows auto generating of subtitles/closed captions for a VOD. To auto generate vod captions we need the GUID of a video we wish to generate subtitles for. To generate subtitles/captions POST /broker/private/vod/encode/audio/{guid} is used. Executing the request will start the process of creating auto-generated closed captions/subtitles for the video.
Encoding or re-encoding sources.
The POST /broker/private/vod/encode/{guid} allows for reencoding of a video source. This is useful when editing a video or adding additional subtitle files. The request accepts a VOD guid.
Custom metadata.
The iOiO Broker service also allows using custom metadata. In order to enable the usage of custom metadata a few steps needs to be followed. Definition of the custom metadata fields. Defining the custom metadata fields is done via the ioAuth Service. The staging ioAuth service’s swagger can be found on the following address: https://ioauth-stg-swagger-bucket.s3-us-west-2.amazonaws.com/index.html
The requests for the custom metadata fields can be found under the Meta Groups section in the swagger:
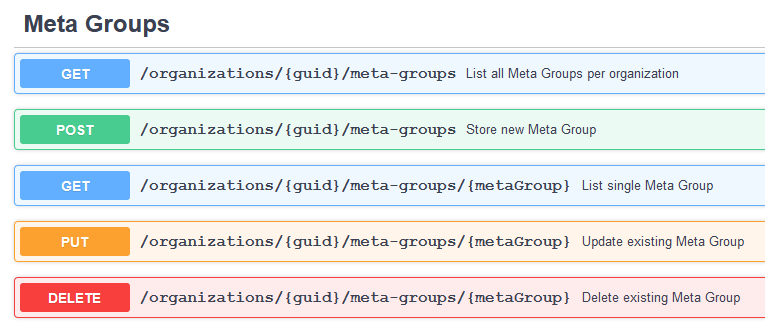
The meta groups can be assigned to various assets throughout the iOiO platform. The 4 main types of assets to which the Meta Groups can be assigned are:
- Video Asset - this is for all videos
- Playlist Asset - this group is applicable for all playlists which are created
- Channel Asset - This group applies for all channels which are created within the channel manager
- Listing Asset - This applies to the listings which are created in the channel manager.
When creating a new Meta Group there is a field named attachment which requires to have the guid of one of the corresponding asset types.
A sample flow will be reviewed below:
- Select the organization in which the meta groups will be created. Get the organization GUID since it will be required for the next steps.
- Depending on the application of the meta group we need to get the guid of the attachment. This is done via the List all Meta Group Attachments per organization

The meta group attachments has one required parameter which is the organization GUID. A sample response body looks like this:
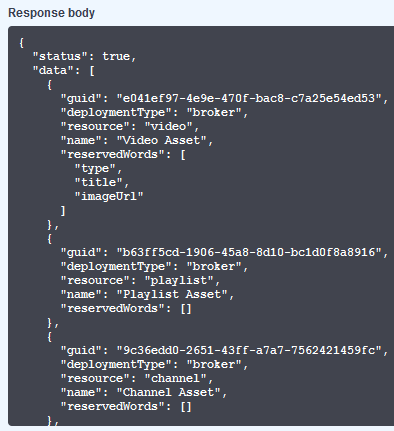
Note: For the Video Asset there is an array which includes reserved words. These words should not be used for names of custom meta fields since there are already fields with these names in the standard set of fields.
- Once we have the attachment guid of our choice we need to create a new Meta Group. This is done via the Store new Meta Group endpoint:
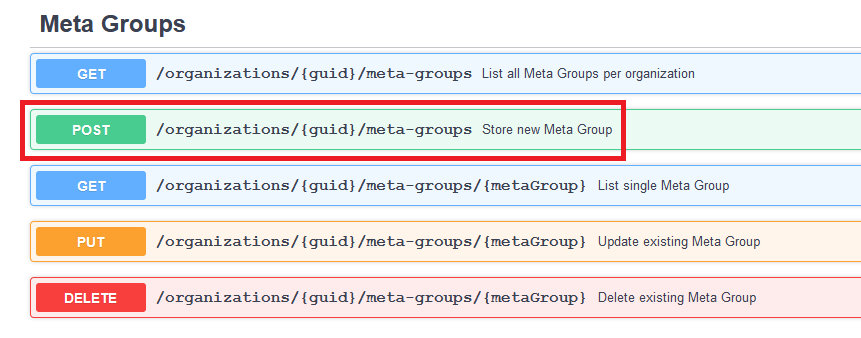
The endpoint needs the organization guid for which we’re creating the meta fields and a json which defines the meta fields which we need.

Here we need to fill in a few things which are required:
- attachment: the GUID meta group attachment which is retrieved from above.
- name: This is the name of the Meta Group.
- fields: this array contains the fields which are used in the meta groups.
- Creating a field in a meta group.
"fields": [
{
            "min": 0,
            "max": 0,
            "name": "string",
            "additionalData": {},
            "type": "string",
            "required": true
      }
   ]
The above json is a sample of 1 field we’ll go through each field of the json to explain what its purpose is:
- min: A number indicating minimum number of characters in the field
- max: A number indication the maximum number of character which the field can have
- name: A string which holds the name of the field.
- additionalData: In here can be stored additional items and data relevant to the field. For example if we have a field of type enum, the values can be stored in the additionalData.
- type: a string which holds the type of the field, supported types are:
- string
- number
- enum
- boolean
- json
- required: a boolean to set the field as required or not.
Below is a sample of an enum field:
        {
                "name": "typ",
                "type": "enum",
                "required": true,
                "additionalData": {
                    "enumOptions": [
                            "delta",
                            "bravo",
                            "tango",
                            "Hotel",
                            "zeta"
                        ]
                    }
        }
- Once we have a field created we can now save a new video asset with the custom meta field. The request which allows us to do this is Edit VOD metadata

The payload of the PUT request looks like this:
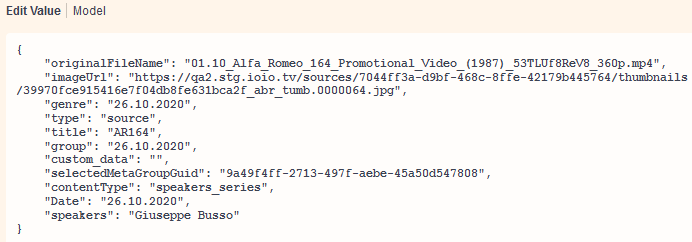
If we look closer we can see that we have a field selectedMetaGroupGuid which stores the Meta Group so that when we need to visualize the fields in the video we know which meta group model to use. After the selectedMetaGroupGuid we can see that there are three more fields, these are the custom fields that we have in this meta group. Note that the aforementioned way for using the custom meta fields allows easier implementation from a Front End application where we use the Meta Group Fields as a definition for the meta data of a video. The Meta Group Fields serves as a template for the visualization of the fields.
With this in mind custom fields can be added without the need to have them defined in the Meta Group Fields but this poses a difficulty when trying to visualize a video with custom meta fields and apply restrictions to the fields.
# Subscribing to Webhooks notifications
The iOiO system supports notifications via email and webhooks. In the steps below we’ll review the way to subscribe to either of the two types of notifications.
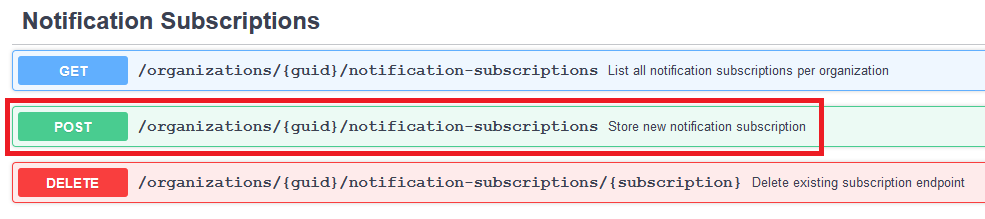
From the ioAuth API the Store new notification subscription endpoint is required for notifications subscriptions:
The endpoint requires an organization GUID and a payload containing the type of notification and the endpoint to which the notification to be pushed. A sample json looks like this:
{
  "endpoint": "https://ioiowebhooks.requestcatcher.com/",
  "type": "https"
}
Once executed the subscription will be with a pending status, which means that it needs to be confirmed, otherwise no notifications will be received on the endpoint. The notification which has the SubscribeURL field will look like this:
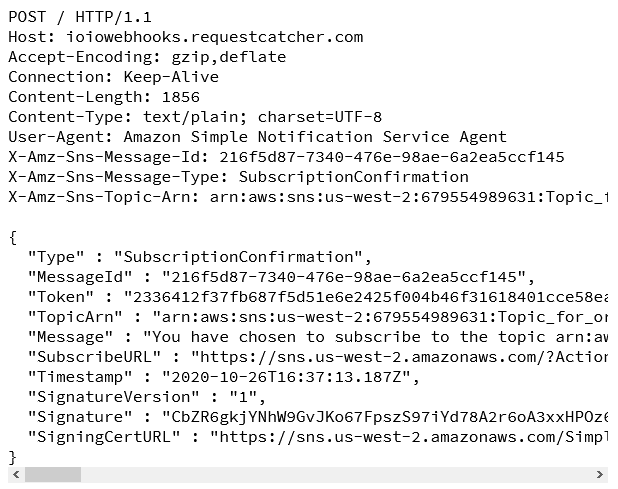
Once received the SubscribeURL needs to be opened in order for the notification to be confirmed and the status of the subscription to be changed from Pending to Confirmed.
To check the status of our subscription we use the List all notification subscriptions per organization endpoint:
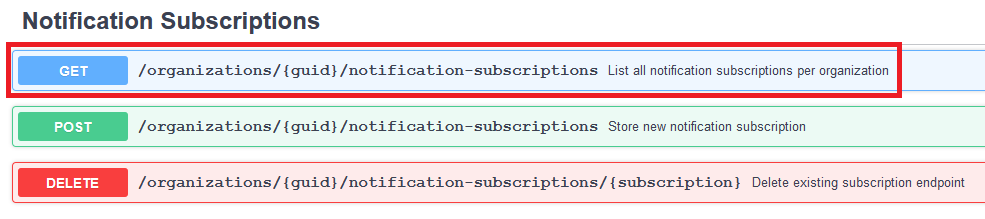
The endpoint requires the organization GUID in order to display all subscriptions in the given organization.

As we can see our notification is with a status PendingConfirmation. Now we need to open the SubscribeURL so that we can confirm the subscription.

Now we can see that our notification subscription is confirmed and notification will be received on the given endpoint.