# Quick How-To guide setting up SSO with Okta
The IOIO supports SSO with various providers, in this guide we will follow all the steps that needs to be taken to integrate SSO with Okta.
Prerequisites:
- Account in Okta
- Admin account in IOIO
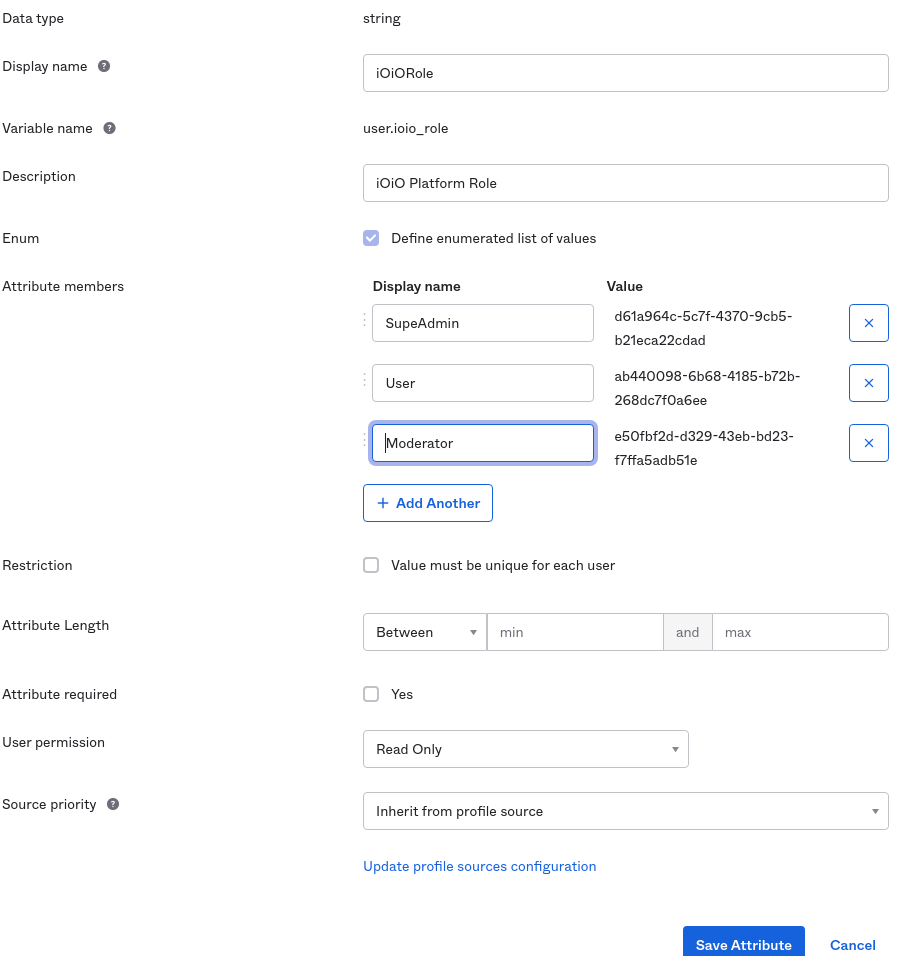
Set up the iOiO roles in the Okta portal Each Okta user should have an assigned role with iOiO in order to login and use the iOiO portal. First you need to create a custom field in the Okta portal: Go to Directory -> Profile Editor -> Okta User Profile -> Add attribute You need to create a new attribute to store the user iOiO role:
- Data type should be string
- Variable name: ioio_role
- the Enum flag to be selected.
The attribute members are a list of iOiO role identifiers. You can get them from the iOiO platform -> Roles and Permissions
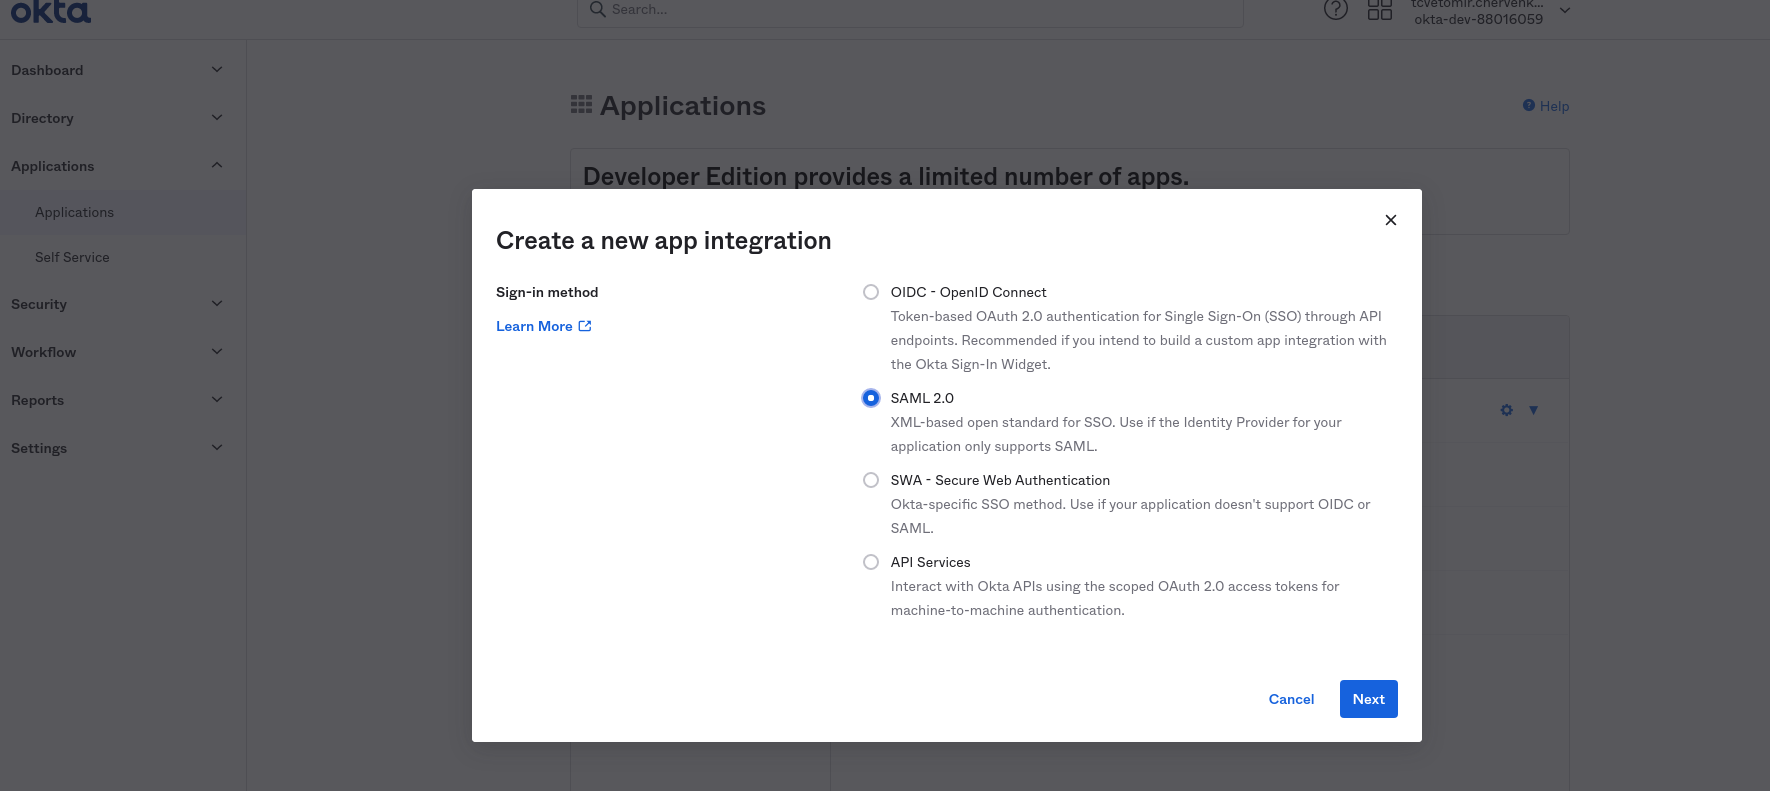
Create new Application. Go to Applications -> Create App Integration and select SAML 2.0
 General settings
Fill in the name of the application and select Next
General settings
Fill in the name of the application and select Next

SAML Settings. Single sign on URL: https://auth.ioio.tv/saml2/idpresponse Audience URI (SP Entity ID): urn:amazon:cognito:sp:us-east-1_LggtRKfi8

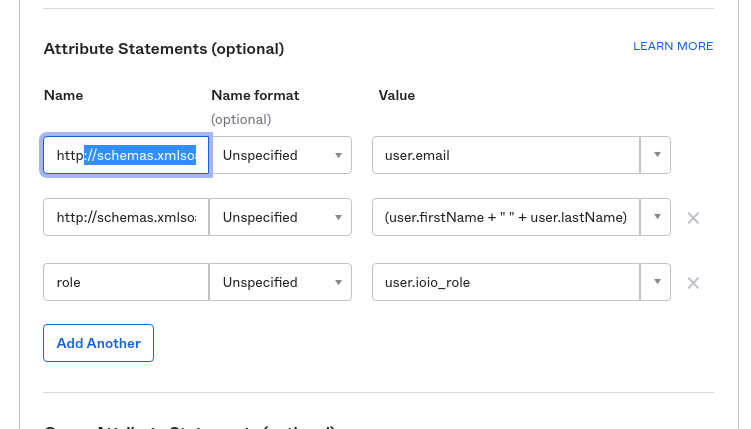
Attribute Statements Fill in the attributes as provided below name and value and click Add another
Name - Value http://schemas.xmlsoap.org/ws/2005/05/identity/claims/emailaddress - user.email
Name - Value http://schemas.xmlsoap.org/ws/2005/05/identity/claims/name - (user.firstName + " " + user.lastName)
- Name - Value
- role - user.ioio_role
Please note that you can use your own fields to provide the information! (values of the attributes)
After that click Next and finish the configuration.
Please make sure that every person assigned to the iOiO application has an assigned iOiO role!
Finally you should provide iOiO with the Identity Provider metadata

It is a URL to the Application metadata: Example: https://dev-88016059.okta.com/app/exk2k7vsnaXGYmklb5d7/sso/saml/metadata