# Setup a cross-account CDN using Cloudfront
In this article we will explain how to setup a cross-account Cloudfront CDN. Before we start there are a few things that needs to be done.
Prerequisites:
- IOIO.tv account with administration rights
- AWS Administrative account
Guide Steps
- Setup a basic Cloudfront Distribution
- Create an Origin Access Identity
- Setup a Cloudfront Behavior
- Update S3 Bucket Policy
- Setup the CDN in the IOIO Front End
Steps 1 to 3 are executed in the external for the IOIO Ecosystem AWS Acount whereas step 4 is executed where the IOIO installation is.
Setup a basic Cloudfront Distribution
Log into your AWS Account, go to Cloudfront and click on Create distribution:
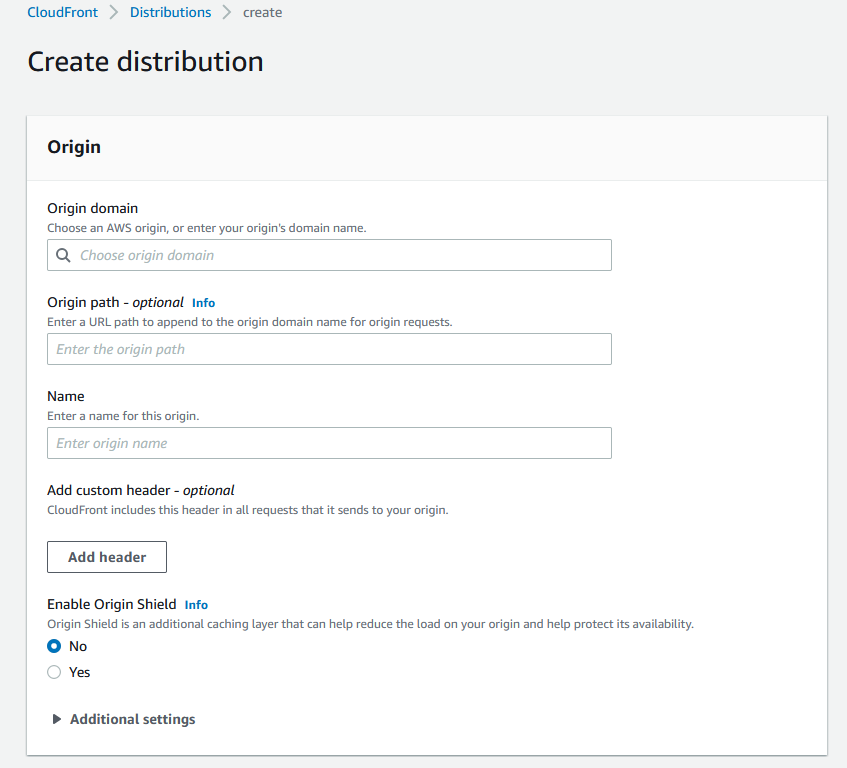
After the distribution has been created open it if it's not been opened automatically and click on Origins.
Click on Create origin:
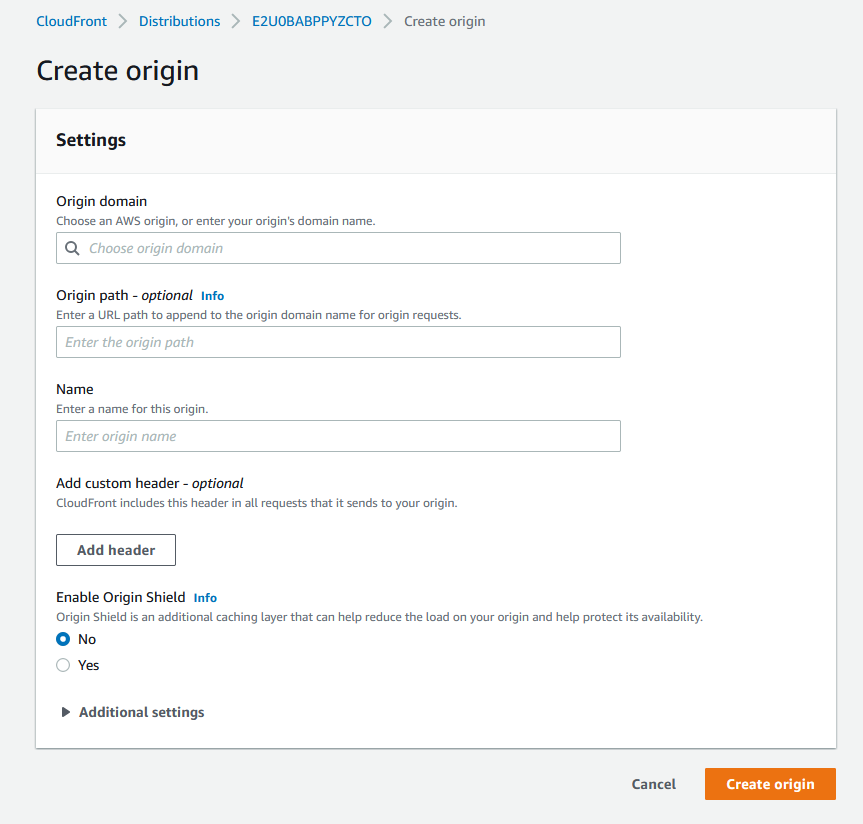
For Origin domain input the S3 bucket's address which has the following format:
<bucket-name>.s3.<aws-region>.amazonaws.com
- Do not choose an S3 bucket from the list since the needed bucket is in a different account and it will not be listed.
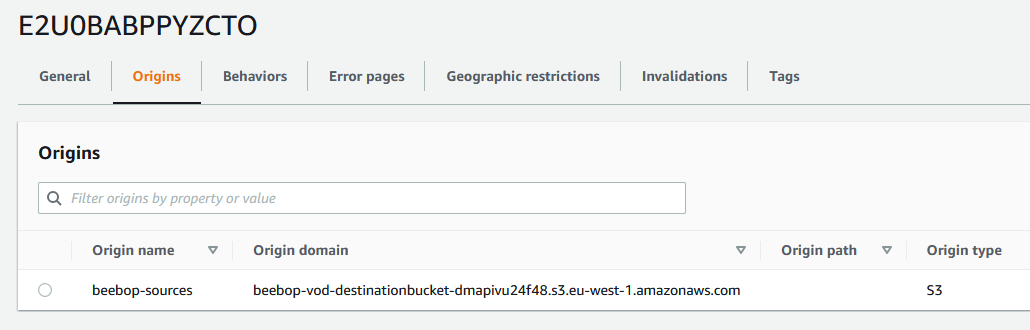
- Enter a name for the origin and create it. It should look similar to this:
Create an Origin Access Identity
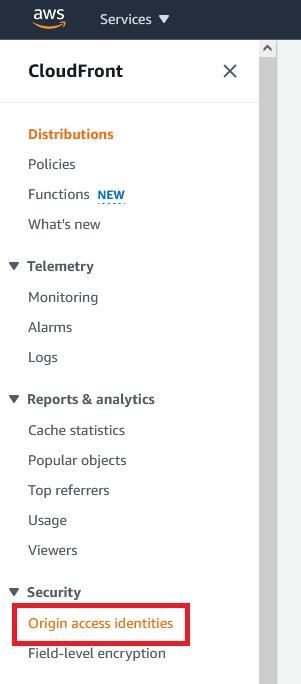
Open the side menu and click on the Origin access identities:
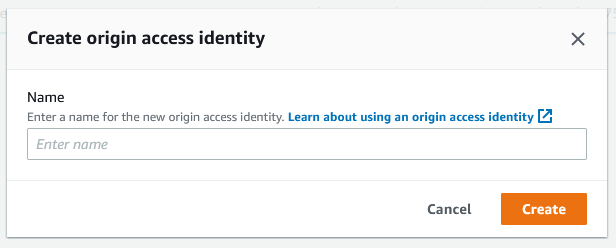
Click on Create origin access identity, in the Name field enter a name of your liking and click on Create:
- Once created find the Origin access identity using the search field and copy the ID:
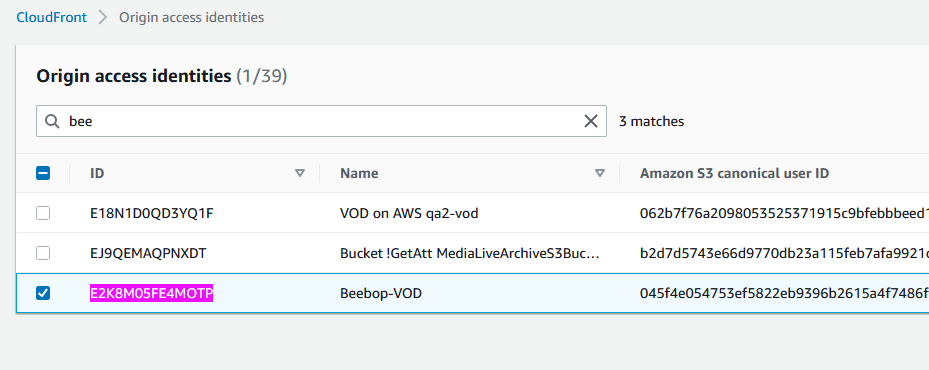
- The ID will be needed later on when setting up the S3 Bucket Policy
Setup a Cloudfront Behavior
- Go back to the Cloudfront distribution which has been created earlier, select Behaviors and click on Create behavior:
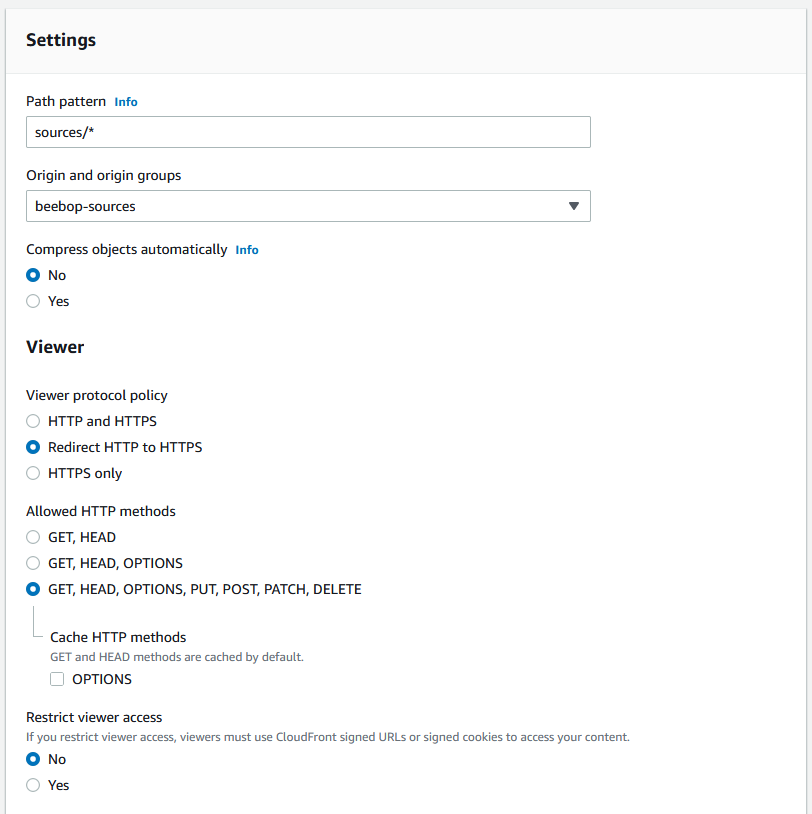
in Settings use the following:
- Path pattern - sources/*
- Origin and origin groups - The origin that you've created above
- Compress objects automatically - No
- Viewer protocol policy - Redirect HTTP to HTTPS
- Allowed HTTP methods: GET, HEAD, OPTIONS, PUT, POST, PATCH, DELETE
- Restrict viewer access - No
- Scroll down to Cache key and origin requests
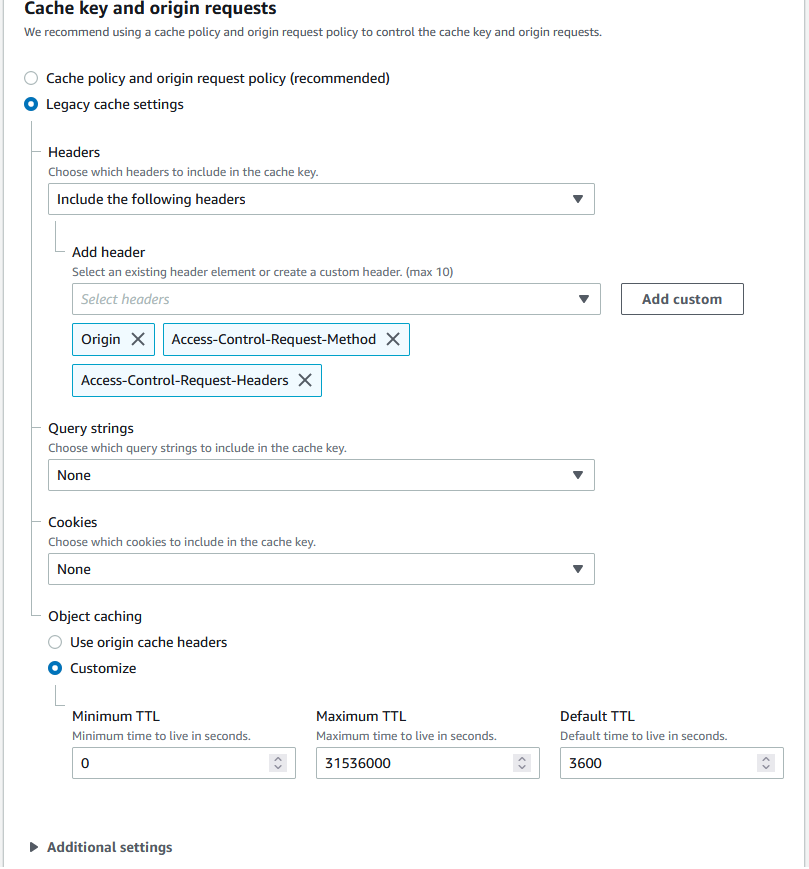
in Cache key and origin requests use the following:
- Legacy cache settings
- Include the following headers: Origin, Access-Control-Request-Method, Access-Control-Request-Headers
- Query strings - None
- Cookies - None
- Object caching - Customize
- Default TTL: 3600
- Click on Create behavior
Update S3 Bucket Policy
- Open the S3 service and find the destination bucket for the IOIO VOD Service. Usually the bucket is named
<organization>-vod-destinationbucket-<hash-string>
Open the Bucket Permissions, scroll down to Bucket Policy and click on Edit:
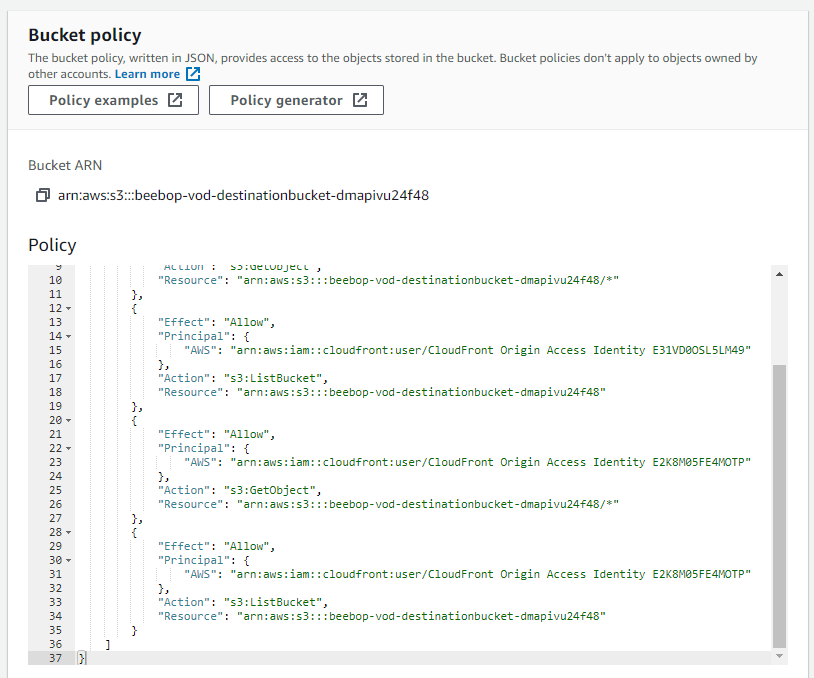
Add to the existing policy the following:
        {
            "Effect": "Allow",
            "Principal": {
                "AWS": "arn:aws:iam::cloudfront:user/CloudFront Origin Access Identity <origin_access_identity_ID>"
            },
            "Action": "s3:GetObject",
            "Resource": "arn:aws:s3:::<bucket_name>/*"
        },
        {
            "Effect": "Allow",
            "Principal": {
                "AWS": "arn:aws:iam::cloudfront:user/CloudFront Origin Access Identity <origin_access_identity_ID>"
            },
            "Action": "s3:ListBucket",
            "Resource": "arn:aws:s3:::<bucket_name>"
        }
Now that this has been done log into your IOIO account and open the Settings page:
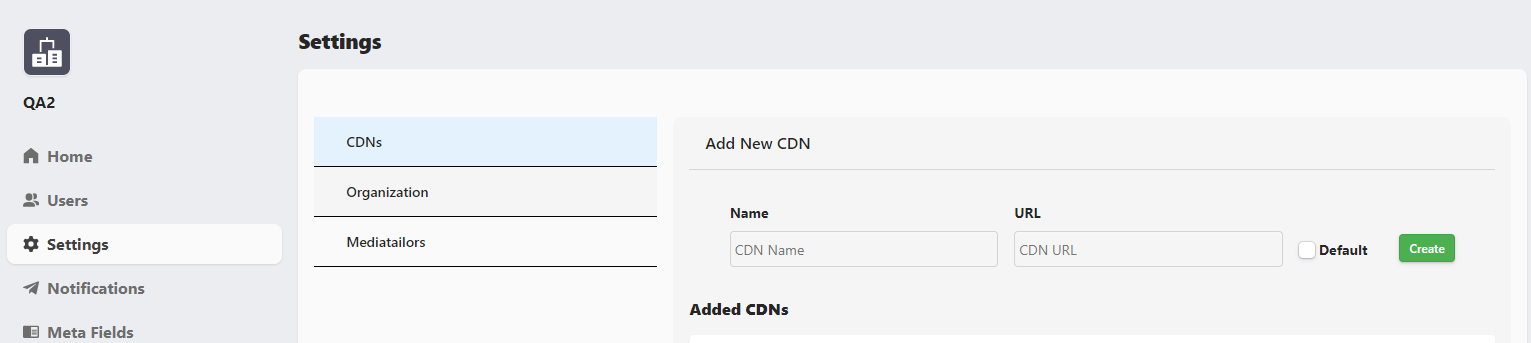
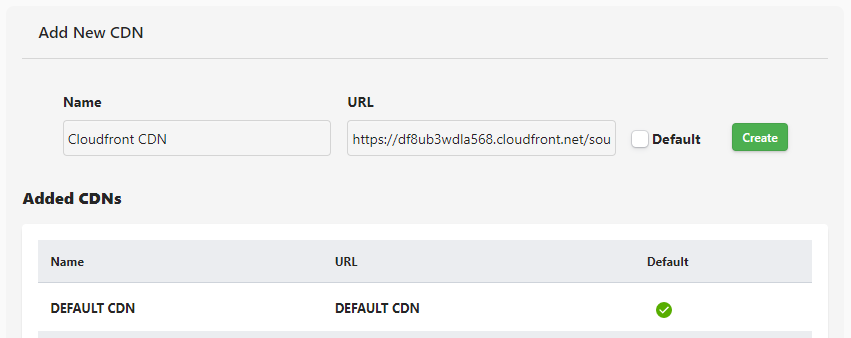
Enter a name for your new CDN and the URL that it's using:
Note
- The name of the CDN can be any random string
- The URL is the Distribution domain name with an additional /sources afterwards
If you want to have this set as default at the moment of creation, check the Default checkbox and click on Create
When this is done we have the new CDn created and it is set as default:
After all of the above steps are completed, your content is served via the newly added CDN that you've just configured.